Tag: Visual edit |
m (replaced: {{TradeRoute6}} → {{TradeRouteIcon6}} (4), {{Housing6}} → {{HousingIcon6}} (9), {{Moves6}} → {{MovesIcon6}}, {{GreatPerson6}} → {{GreatPersonIcon6}} (2), {{Envoy6}} → {{EnvoyIcon6}} (4), {{Amenities6}} → {{AmenitiesIcon6}} (2)) |
||
| (47 intermediate revisions by 18 users not shown) | |||
| Line 2: | Line 2: | ||
{{BackArrow|City (Civ6)|Back to City}} |
{{BackArrow|City (Civ6)|Back to City}} |
||
| − | A '''district''' is one of the many parts of a [[City (Civ6)|city]] in ''[[Civilization VI]]'' that manifests the city's development and specialization over time. Districts are a brand new feature in ''Civilization VI''. |
+ | A {{DistrictIcon6}} '''district''' is one of the many parts of a [[City (Civ6)|city]] in ''[[Civilization VI]]'' that manifests the city's development and specialization over time. Districts are a brand new feature in ''Civilization VI''. |
| − | [[ |
+ | [[File:Civilization_VI_screenshot_1.jpg|thumb|Districts and World Wonders around a city]] |
== What is a District? == |
== What is a District? == |
||
| Line 11: | Line 11: | ||
Once built, districts will confer stat yields, bonuses and unlock new possibilities for their parent city, such as the ability to build certain [[Building (Civ6)|buildings]] and possibly [[Unit (Civ6)|units]]. What's more, buildings that are related to a certain district will appear in the district itself rather than the city-center tile. Your [[Library (Civ6)|Library]] and [[University (Civ6)|University]], for example, will appear in your Campus district (the {{Science6}}-oriented part of the city), not in the main city. Similarly, once you've built an [[Encampment (Civ6)|Encampment]] district, your military units will start appearing there, instead of in the main city. Once you've built a [[Harbor (Civ6)|Harbor]] district, you will be able to build ships there, even though your city center is away from the shore. |
Once built, districts will confer stat yields, bonuses and unlock new possibilities for their parent city, such as the ability to build certain [[Building (Civ6)|buildings]] and possibly [[Unit (Civ6)|units]]. What's more, buildings that are related to a certain district will appear in the district itself rather than the city-center tile. Your [[Library (Civ6)|Library]] and [[University (Civ6)|University]], for example, will appear in your Campus district (the {{Science6}}-oriented part of the city), not in the main city. Similarly, once you've built an [[Encampment (Civ6)|Encampment]] district, your military units will start appearing there, instead of in the main city. Once you've built a [[Harbor (Civ6)|Harbor]] district, you will be able to build ships there, even though your city center is away from the shore. |
||
| − | Most Districts are "'''Specialty Districts'''"; that is, they fulfill a specific gameplay role, not technically related to the city's basic functioning. They are subject to population constraints, meaning that the current {{Citizen6}} Population of the city will determine the maximum number of Specialty districts which it may construct. Specialty districts confer a number of other bonuses to their city (for example, additional {{Strength6}} Combat Strength) and determine its eligibility for many [[Policy Cards (Civ6)|Policies]]' bonuses. All Specialty districts also have a [[Project (Civ6)|project]] attached to them: these projects are undertaken from the city production queue, and upon completion award a set amount of yields and {{ |
+ | Most Districts are "'''Specialty Districts'''"; that is, they fulfill a specific gameplay role, not technically related to the city's basic functioning. They are subject to population constraints, meaning that the current {{Citizen6}} Population of the city will determine the maximum number of Specialty districts which it may construct. Specialty districts confer a number of other bonuses to their city (for example, additional {{Strength6}} Combat Strength) and determine its eligibility for many [[Policy Cards (Civ6)|Policies]]' bonuses. All Specialty districts also have a [[Project (Civ6)|project]] attached to them: these projects are undertaken from the city production queue, and upon completion award a set amount of yields and {{GreatPersonIcon6}} Great Person points (depending on the district), and may be done as many times as desired. |
| − | There are also the so-called 'engineering' districts (like the [[Aqueduct (Civ6)|Aqueduct]], the [[Neighborhood (Civ6)|Neighborhood]] or the [[Dam (Civ6)|Dam]] in ''Gathering Storm''), which are exceptional - despite being built outside of the City Center they are considered an integral part of the city systems, and may be built in any city where the necessary prerequisites are met, regardless of {{Citizen6}} Population and how many other Districts it has. |
+ | There are also the so-called 'engineering' districts (like the [[Aqueduct (Civ6)|Aqueduct]], the [[Neighborhood (Civ6)|Neighborhood]] or the [[Dam (Civ6)|Dam]] in ''Gathering Storm''), which are exceptional - despite being built outside of the City Center they are considered an integral part of the city systems, and may be built in any city where the necessary prerequisites are met, regardless of {{Citizen6}} Population and how many other Districts it has. Also, in ''Gathering Storm'', the construction of these districts can be rushed by [[Military Engineer (Civ6)|Military Engineers]]. |
Different districts are unlocked over time via technical or civic development. Check individual articles for specifics. |
Different districts are unlocked over time via technical or civic development. Check individual articles for specifics. |
||
| Line 20: | Line 20: | ||
Districts are built via the normal production process of the city - just look in the Production list. Of course, you will need first to make the necessary technological or civic advancements to unlock the district. Next, since Districts are built '''outside '''the City Center, you will also need a suitable plot of land. Finally, for Specialty districts you will need to increase the city's {{Citizen6}} Population first. New cities won't have enough citizens to populate and work a separate district; over time, this situation will change, and you will be able to choose to add a district to the city, instead of, say, build a building or a unit. Starting from {{Citizen6}} Population of 1, each 3 additional {{Citizen6}} Citizens allow support for one additional District (so 4, 7, etc.). |
Districts are built via the normal production process of the city - just look in the Production list. Of course, you will need first to make the necessary technological or civic advancements to unlock the district. Next, since Districts are built '''outside '''the City Center, you will also need a suitable plot of land. Finally, for Specialty districts you will need to increase the city's {{Citizen6}} Population first. New cities won't have enough citizens to populate and work a separate district; over time, this situation will change, and you will be able to choose to add a district to the city, instead of, say, build a building or a unit. Starting from {{Citizen6}} Population of 1, each 3 additional {{Citizen6}} Citizens allow support for one additional District (so 4, 7, etc.). |
||
| − | Note that each Specialty District may only be built ''once'' in a city! This is also valid for non-Specialty Districts, the only exception being the [[Neighborhood (Civ6)|Neighborhood]]. Also, once you choose a place for a District, even though you haven't finished building it yet, you will be unable to alter your choice! These two facts mean that you should really think very carefully before placing your Districts, so as to maximize your future gains and prevent conflicts of interests (for example with Wonders). |
+ | Note that each Specialty District may only be built ''once'' in a city! This is also valid for non-Specialty Districts, the only exception being the [[Neighborhood (Civ6)|Neighborhood]] and the [[Canal (Civ6)|Canal]]. Also, once you choose a place for a District, even though you haven't finished building it yet, you will be unable to alter your choice! These two facts mean that you should really think very carefully before placing your Districts, so as to maximize your future gains and prevent conflicts of interests (for example with Wonders). |
=== Suitable locations === |
=== Suitable locations === |
||
After you unlock a District and have enough {{Citizen6}} Population to build it, just select it from them menu and an interface will appear in order to select a location. Valid locations will be highlighted in green. Each city can only build districts on tiles which are included in its own [[Territory (Civ6)|territory]]. You cannot place districts in other cities' territory, even if these other cities belong to you and the tile in question is up to three tiles away from the [[City Center (Civ6)|City Center]]! |
After you unlock a District and have enough {{Citizen6}} Population to build it, just select it from them menu and an interface will appear in order to select a location. Valid locations will be highlighted in green. Each city can only build districts on tiles which are included in its own [[Territory (Civ6)|territory]]. You cannot place districts in other cities' territory, even if these other cities belong to you and the tile in question is up to three tiles away from the [[City Center (Civ6)|City Center]]! |
||
| − | You cannot place a District on [[Floodplains (Civ6)|Floodplains Terrain]] (not applicable in ''Gathering Storm'' - there you can construct districts on all types of Floodplains), on a tile with a [[Resources (Civ6)#Strategic Resources|Strategic]] or [[Resources (Civ6)#Luxury Resources|Luxury Resource]], a tile containing an {{AntiquitySite6}} |
+ | You cannot place a District on [[Floodplains (Civ6)|Floodplains Terrain]] (not applicable in ''Gathering Storm'' - there you can construct districts on all types of Floodplains), on a tile with a [[Resources (Civ6)#Strategic Resources|Strategic]] or [[Resources (Civ6)#Luxury Resources|Luxury Resource]], a tile containing an {{AntiquitySite6}} or a {{Shipwreck6}} (you may use these tiles later, after you excavate its {{Artifact6}} Artifact), or a tile containing another District or [[Wonder (Civ6)|Wonder]]. The tile may contain a [[Resources (Civ6)#Bonus Resources|Bonus Resource]], but it will be removed on placement, so you should either reconsider the placement or Harvest the resource beforehand. |
| − | Note that hidden [[Resources (Civ6)#Strategic Resources|Strategic resources]] do ''not'' block placement of districts! After you develop technologies later which reveal them, it's often the case that you've built a district in a tile with a Strategic Resource. In this case you will be granted access to that resource, even though you don't have the appropriate [[Tile improvement (Civ6)|improvement]] on it, and even though you haven't discovered the appropriate technology to access it (which is the case with {{Oil6}} |
+ | Note that hidden [[Resources (Civ6)#Strategic Resources|Strategic resources]] do ''not'' block placement of districts! After you develop technologies later which reveal them, it's often the case that you've built a district in a tile with a Strategic Resource. In this case you will be granted access to that resource, even though you don't have the appropriate [[Tile improvement (Civ6)|improvement]] on it, and even though you haven't discovered the appropriate technology to access it (which is the case with {{Oil6}} when found in the sea - its access technology is more advanced than the one revealing it). |
| − | Districts can only be built on "clean" land. Any removable feature ([[Woods (Civ6)|Woods]], [[Rainforest (Civ6)|Rainforest]] or [[Marsh (Civ6)|Marsh]]) will be removed at placement, if you have the respective technology...and if you don't, you won't be able to place the District there. Furthermore, the [[Harbor (Civ6)|Harbor]] and [[Water Park (Civ6)|Water Park]] Districts may only be placed on a Sea Coast tile adjacent to land; the [[Aerodrome (Civ6)|Aerodrome]] and [[Spaceport (Civ6)|Spaceport]] Districts may only be placed on flat land (no [[Hills (Civ6)|Hills]]!), and the [[Encampment (Civ6)|Encampment]] District cannot be placed next to the [[City Center (Civ6)|City Center]]. Also, the [[Aqueduct (Civ6)|Aqueduct]] district must be placed adjacent to both the [[City Center (Civ6)|City Center]] and to a tile with [[River (Civ6)|River]], [[Lake (Civ6)|Lake]], [[Oasis (Civ6)|Oasis]] or [[Mountain (Civ6)|Mountain]]. The idea here is that you can decide for strategic purposes to Found a [[City (Civ6)|City]] close to, but not adjacent to these features, and later connect the city to them by an Aqueduct to get the Fresh Water {{ |
+ | Districts can only be built on "clean" land. Any removable feature ([[Woods (Civ6)|Woods]], [[Rainforest (Civ6)|Rainforest]] or [[Marsh (Civ6)|Marsh]]) will be removed at placement, if you have the respective technology...and if you don't, you won't be able to place the District there. Furthermore, the [[Harbor (Civ6)|Harbor]] and [[Water Park (Civ6)|Water Park]] Districts may only be placed on a Sea Coast tile adjacent to land; the [[Aerodrome (Civ6)|Aerodrome]] and [[Spaceport (Civ6)|Spaceport]] Districts may only be placed on flat land (no [[Hills (Civ6)|Hills]]!), and the [[Encampment (Civ6)|Encampment]] District cannot be placed next to the [[City Center (Civ6)|City Center]]. Also, the [[Aqueduct (Civ6)|Aqueduct]] district must be placed adjacent to both the [[City Center (Civ6)|City Center]] and to a tile with [[River (Civ6)|River]], [[Lake (Civ6)|Lake]], [[Oasis (Civ6)|Oasis]] or [[Mountain (Civ6)|Mountain]]. The idea here is that you can decide for strategic purposes to Found a [[City (Civ6)|City]] close to, but not adjacent to these features, and later connect the city to them by an Aqueduct to get the Fresh Water {{HousingIcon6}} Housing bonus. In ''Gathering Storm'', [[Dam (Civ6)|Dam]] districts may only be placed on a floodplain tile of the same river the city is built on, and [[Canal (Civ6)|Canal]] districts may be placed so as to connect bodies of water either with other bodies of water or with a [[City Center (Civ6)|City Center]]. |
Finally, note that the native yields of the target tile will be removed, and replaced later with yields associated with the District itself (Adjacency bonus yields, as well as Specialist yields). So, take care where you place your districts! Theoretically, the best locations for Districts are tiles with little or no native yield, such as [[Desert (Civ6)|Desert]] or [[Tundra (Civ6)|Tundra]]. But of course, you should pay attention to the Adjacency bonuses (current and potential) first and foremost. |
Finally, note that the native yields of the target tile will be removed, and replaced later with yields associated with the District itself (Adjacency bonus yields, as well as Specialist yields). So, take care where you place your districts! Theoretically, the best locations for Districts are tiles with little or no native yield, such as [[Desert (Civ6)|Desert]] or [[Tundra (Civ6)|Tundra]]. But of course, you should pay attention to the Adjacency bonuses (current and potential) first and foremost. |
||
| Line 43: | Line 43: | ||
=== Production cost === |
=== Production cost === |
||
The {{Production6}} cost of a District is progressive, starting from a "base price" in the beginning of the game. Each technology or civic you research increases the price by the following formula: |
The {{Production6}} cost of a District is progressive, starting from a "base price" in the beginning of the game. Each technology or civic you research increases the price by the following formula: |
||
| − | <p style="background-color:white;"></p> |
||
| − | <math>FLOOR (BaseCost (1 + 9 * FLOOR (100 * MAX (CompletedTechs / |
+ | <p style="background-color:white;"><math>FLOOR (BaseCost (1 + 9 * FLOOR (100 * MAX (CompletedTechs / 77, CompletedCivics / 61)) / 100))</math></p> |
In simpler language, the price is determined by the percentage of the total techs or civics you've researched, whichever is greater. The more techs or civics you have researched, the more expensive District construction is. |
In simpler language, the price is determined by the percentage of the total techs or civics you've researched, whichever is greater. The more techs or civics you have researched, the more expensive District construction is. |
||
| − | The base price for most Districts is 54 {{Production6}}, with the exception of the [[Aqueduct (Civ6)|Aqueduct]] (whose base cost is 36 {{Production6}}), and the [[Spaceport (Civ6)|Spaceport]] (whose base cost is 1800 {{Production6}}, equaling it to a Wonder). As a result of price scaling, Districts become increasingly more difficult to construct as the game progresses. For old, big cities this isn't such a problem, usually, (since their {{Production6}} potential also increases gradually), but for newly established cities in the [[Modern Era (Civ6)|Modern]] and later Eras it becomes a great hindrance. So, it is highly important to place your districts the moment your city population and the relevant tech allows, or you risk wasting construction time unnecessarily. This means you need to plan ahead of time where and in what order you want to build your districts in each city. Usually, there is a generic ordering based on the phase of the game and the victory type you are pursuing. Check out the pages for each district for detailed strategy. |
+ | The base price for most Districts is 54 {{Production6}}, with the exception of the [[Aqueduct (Civ6)|Aqueduct]] (whose base cost is 36 {{Production6}}), the [[Government Plaza (Civ6)|Government Plaza]] (whose base cost is 30 {{Production6}}), and the [[Spaceport (Civ6)|Spaceport]] (whose base cost is 1800 {{Production6}}, equaling it to a Wonder). As a result of price scaling, Districts become increasingly more difficult to construct as the game progresses. For old, big cities this isn't such a problem, usually, (since their {{Production6}} potential also increases gradually), but for newly established cities in the [[Modern Era (Civ6)|Modern]] and later Eras it becomes a great hindrance. So, it is highly important to place your districts the moment your city population and the relevant tech allows, or you risk wasting construction time unnecessarily. This means you need to plan ahead of time where and in what order you want to build your districts in each city. Usually, there is a generic ordering based on the phase of the game and the victory type you are pursuing. Check out the pages for each district for detailed strategy. |
| − | Districts apart from the City Center, Aqueduct, Canal, Dam, Spaceport and Neighborhood can be discounted 40% with the exception of the Government |
+ | Districts apart from the [[City Center (Civ6)|City Center]], [[Aqueduct (Civ6)|Aqueduct]], [[Canal (Civ6)|Canal]], [[Dam (Civ6)|Dam]], [[Spaceport (Civ6)|Spaceport]] and [[Neighborhood (Civ6)|Neighborhood]] can be discounted 40%, with the exception of the [[Government Plaza (Civ6)|Government Plaza]], which has a discount of 25%. This discount occurs when the total number of completed districts divided by the districts researched is at least 1 and this average number rounded up is larger than the current number of the type of district you want to place. This current number includes unfinished districts. When a district is finished a tech or civic must be completed to update the formula. This discount can save a significant amount of production early if used correctly but is restrictive in some ways.A full guide can be found here [https://forums.civfanatics.com/resources/civ-vi-district-discounts.27783/] |
| − | Constructing Districts, and [[Building (Civ6)|Buildings]] can be accelerated via Industrial [[City- |
+ | Constructing Districts, and [[Building (Civ6)|Buildings]] can be accelerated via Industrial [[City-state (Civ6)|City-states]]. The {{Capital6}} gains a +2 {{Production6}} bonus from every such City-State where you have at least 1 {{EnvoyIcon6}} Envoy. All other cities which have an [[Industrial Zone (Civ6)|Industrial Zone]] will gain +2 {{Production6}} bonus from every such City-State where you have 3 {{EnvoyIcon6}} Envoys, and another +2 {{Production6}} if you have 6 {{EnvoyIcon6}} Envoys. |
Each District you construct will come with a Road improvement underneath, starting with the [[City Center (Civ6)|City Center]]. |
Each District you construct will come with a Road improvement underneath, starting with the [[City Center (Civ6)|City Center]]. |
||
== District Mechanics == |
== District Mechanics == |
||
| − | Each District in the game is focused on a particular gameplay aspect. For example, the [[Campus (Civ6)|Campus]] is focused on {{Science6}}, and the [[Theater Square (Civ6)|Theater Square]] on {{Culture6}}. If you manage to activate their Adjacency bonuses, these Districts will start contributing a particular yield related to their gameplay aspect ({{Science6}} from the Campus, {{Culture6}} for the Theater Square, etc.) even before you construct any Buildings in them. These yields may be enhanced further through Social Policies. For more information, see below. Furthermore, most Districts will immediately start contributing {{ |
+ | Each District in the game is focused on a particular gameplay aspect. For example, the [[Campus (Civ6)|Campus]] is focused on {{Science6}}, and the [[Theater Square (Civ6)|Theater Square]] on {{Culture6}}. If you manage to activate their Adjacency bonuses, these Districts will start contributing a particular yield related to their gameplay aspect ({{Science6}} from the Campus, {{Culture6}} for the Theater Square, etc.) even before you construct any Buildings in them. These yields may be enhanced further through Social Policies. For more information, see below. Furthermore, most Districts will immediately start contributing {{GreatPersonIcon6}} Great Person points towards a specific Great Person aligned with the District's domain; for example, the [[Campus (Civ6)|Campus]] will contribute towards a [[Great Scientist (Civ6)|Great Scientist]]. |
There are also some districts which may be better described as ''engineering projects'': the [[Aqueduct (Civ6)|Aqueduct]], [[Dam (Civ6)|Dam]], [[Canal (Civ6)|Canal]] and the [[Neighborhood (Civ6)|Neighborhood]]. They are more simple districts which serve specific purposes, such as providing Fresh Water to the city, or protecting it from [[Flood (Civ6)|floods]]. |
There are also some districts which may be better described as ''engineering projects'': the [[Aqueduct (Civ6)|Aqueduct]], [[Dam (Civ6)|Dam]], [[Canal (Civ6)|Canal]] and the [[Neighborhood (Civ6)|Neighborhood]]. They are more simple districts which serve specific purposes, such as providing Fresh Water to the city, or protecting it from [[Flood (Civ6)|floods]]. |
||
| Line 64: | Line 63: | ||
As mentioned above, most Districts unlock specific [[Buildings (Civ6)|Buildings]] associated with them. In fact, even the main city is now considered a separate District, called a [[City Center (Civ6)|City Center]]. The [[Monument (Civ6)|Monument]], [[Granary (Civ6)|Granary]] and all other buildings available to a city right from the start are actually available only because they are associated with the only District this city has for now, the City Center. So, when you build additional Districts later, all Buildings associated with them will also unlock. |
As mentioned above, most Districts unlock specific [[Buildings (Civ6)|Buildings]] associated with them. In fact, even the main city is now considered a separate District, called a [[City Center (Civ6)|City Center]]. The [[Monument (Civ6)|Monument]], [[Granary (Civ6)|Granary]] and all other buildings available to a city right from the start are actually available only because they are associated with the only District this city has for now, the City Center. So, when you build additional Districts later, all Buildings associated with them will also unlock. |
||
| − | Buildings add more functionality to Districts. This usually means more of the yield the District is focused on, but it may also mean additional {{ |
+ | Buildings add more functionality to Districts. This usually means more of the yield the District is focused on, but it may also mean additional {{HousingIcon6}} Housing, certain type of Great Person Points, and also additional {{Citizen6}} Citizen slots where you can assign Specialists. This is particularly important for very large cities, as they won't have enough terrain slots to put their Citizens to work. Building special Buildings in your Districts will provide you with alternative occupations for your Citizen workforce. |
Tier 3 buildings are the most advanced, and besides a slew of bonuses usually add a {{Power6}} requirement to the city (in ''Gathering Storm'' only, of course). After the [[June 2019 Update (Civ6)|June 2019 Update]] the Tier 3 building of Specialty districts will also enhance Specialist yields for the entire district! |
Tier 3 buildings are the most advanced, and besides a slew of bonuses usually add a {{Power6}} requirement to the city (in ''Gathering Storm'' only, of course). After the [[June 2019 Update (Civ6)|June 2019 Update]] the Tier 3 building of Specialty districts will also enhance Specialist yields for the entire district! |
||
| Line 102: | Line 101: | ||
When a city with a Unique district changes hands (gets conquered by another civ), this District will revert to its generic equivalent. For example, the [[Acropolis (Civ6)|Acropolis]] will turn into a normal [[Theater Square (Civ6)|Theater Square]]. |
When a city with a Unique district changes hands (gets conquered by another civ), this District will revert to its generic equivalent. For example, the [[Acropolis (Civ6)|Acropolis]] will turn into a normal [[Theater Square (Civ6)|Theater Square]]. |
||
| + | |||
| + | From ''[[Rise and Fall]]'' onward, the first copy of a unique district grants 4 Era Score; however, there is a difference between two "types" of unique district: |
||
| + | * The unique version of districts that have adjacency bonuses (Seowon, Lavra, Acropolis, Hansa, Cothon, Royal Navy Dockyard, Suguba, Observatory) will only grant Era Scores for building it. You will not get extra Era Scores for high starting adjacency bonus. (i.e. Korea cannot unlock the Splendid Campus historic moment even though their Seowon can start with +4 {{Science6}}) |
||
| + | * The unique version of districts that do not have adjacency bonuses (Ikanda, Street Carnival, Copacabana) will grant Era Scores when built and will still grant more Era Scores when you build all three tiers of building in them. |
||
| + | * Mbanza is an exception. It only grants Era Scores when built but will not unlock the First Neighborhood historic moment. |
||
== Types of Districts == |
== Types of Districts == |
||
| Line 109: | Line 113: | ||
{| class="article-table" |
{| class="article-table" |
||
! District |
! District |
||
| + | !Unique District |
||
! Buildings |
! Buildings |
||
! Adjacency Bonuses/Effects |
! Adjacency Bonuses/Effects |
||
|- |
|- |
||
| − | |{{ |
+ | | style="text-align: center" |{{SurePageIconLineBreak6|City Center}} |
| + | | |
||
| ⚫ | |||
| + | | |
||
| ⚫ | |||
[[Monument (Civ6)|Monument]]<br /> |
[[Monument (Civ6)|Monument]]<br /> |
||
[[Water Mill (Civ6)|Water Mill]]<br /> |
[[Water Mill (Civ6)|Water Mill]]<br /> |
||
| Line 120: | Line 127: | ||
[[Renaissance Walls (Civ6)|Renaissance Walls]]<br /> |
[[Renaissance Walls (Civ6)|Renaissance Walls]]<br /> |
||
[[Tsikhe (Civ6)|''Tsikhe'']]'' ''{{R&F}} [[File:Georgian (Civ6).png|link=Georgian (Civ6)|20px]]<br /> |
[[Tsikhe (Civ6)|''Tsikhe'']]'' ''{{R&F}} [[File:Georgian (Civ6).png|link=Georgian (Civ6)|20px]]<br /> |
||
| − | [[Sewer (Civ6)|Sewer]] |
+ | [[Sewer (Civ6)|Sewer]]<br /> |
| − | |||
[[Flood Barrier (Civ6)|Flood Barrier]] {{GS}} |
[[Flood Barrier (Civ6)|Flood Barrier]] {{GS}} |
||
| |
| |
||
| − | 5 {{ |
+ | 5 {{HousingIcon6}} Housing if adjacent to a River, Lake, or Oasis. |
| − | 3 {{ |
+ | 3 {{HousingIcon6}} Housing if adjacent to a Coast. |
| − | 2 {{ |
+ | 2 {{HousingIcon6}} Housing otherwise. |
Aircraft Capacity: 1 |
Aircraft Capacity: 1 |
||
| Line 132: | Line 138: | ||
Tile is always worked for free. Yields are at least 2 {{Food6}} and 1 {{Production6}}. |
Tile is always worked for free. Yields are at least 2 {{Food6}} and 1 {{Production6}}. |
||
|- |
|- |
||
| + | | style="text-align: center" |{{SurePageIconLineBreak6|Campus}} |
||
| − | |{{PageIcon6|Campus}}<br /> |
||
| − | ''{{ |
+ | |''{{SurePageIconLineBreak6|Observatory|35}}'' [[File:Mayan (Civ6).png|link=Mayan (Civ6)|20px]] |
| + | |||
| ⚫ | |||
| ⚫ | |||
| + | | |
||
| ⚫ | |||
[[University (Civ6)|University]]<br /> |
[[University (Civ6)|University]]<br /> |
||
[[Madrasa (Civ6)|''Madrasa'']] [[File:Arabian (Civ6).png|link=Arabian (Civ6)|20px]]<br /> |
[[Madrasa (Civ6)|''Madrasa'']] [[File:Arabian (Civ6).png|link=Arabian (Civ6)|20px]]<br /> |
||
| Line 148: | Line 157: | ||
+2 {{Science6}} from every Reef |
+2 {{Science6}} from every Reef |
||
|- |
|- |
||
| − | |{{ |
+ | | style="text-align: center" |{{SurePageIconLineBreak6|Canal}} {{GS}}<br /> |
| + | | |
||
| |
| |
||
| Allows passage of naval and embarked units between bodies of water or through a City Center. |
| Allows passage of naval and embarked units between bodies of water or through a City Center. |
||
| Line 154: | Line 164: | ||
Ignores the normal population requirements for district construction. Any number of Canal districts may be built in a city. |
Ignores the normal population requirements for district construction. Any number of Canal districts may be built in a city. |
||
| − | Shortens maritime {{ |
+ | Shortens maritime {{TradeRouteIcon6}} Trade Routes. Provides additional {{Gold6}} for each {{TradeRouteIcon6}} Trade Route that passes through the Canal district. |
|- |
|- |
||
| − | |{{ |
+ | | style="text-align: center" |{{SurePageIconLineBreak6|Dam}} {{GS}}<br /> |
| + | | |
||
|{{Link6|Hydroelectric Dam}}<br /> |
|{{Link6|Hydroelectric Dam}}<br /> |
||
| |
| |
||
| − | Provides +3 {{ |
+ | Provides +3 {{HousingIcon6}} Housing and +1 {{AmenitiesIcon6}} Amenity from Entertainment. |
Prevents [[Flood (Civ6)|Flood damage]] on this River, and reduces yields from [[Flood (Civ6)|Flood]]s by 50%. Also prevents {{Food6}} loss during [[Drought (Civ6)|Droughts]]. |
Prevents [[Flood (Civ6)|Flood damage]] on this River, and reduces yields from [[Flood (Civ6)|Flood]]s by 50%. Also prevents {{Food6}} loss during [[Drought (Civ6)|Droughts]]. |
||
| Line 167: | Line 178: | ||
Only the first Dam to be built on a river will receive benefits from a Dam. |
Only the first Dam to be built on a river will receive benefits from a Dam. |
||
|- |
|- |
||
| + | | style="text-align: center" |{{SurePageIconLineBreak6|Diplomatic Quarter}}<sup>7</sup> |
||
| − | |{{PageIcon6|Holy Site}}<br /> |
||
| + | | |
||
| ⚫ | |||
| − | |[[ |
+ | |[[Consulate (Civ6)|Consulate]] |
| + | |||
| ⚫ | |||
| + | |Diplomacy and espionage-oriented District. |
||
| + | |||
| + | +1 {{Culture6}} ({{GS}} +1 {{DiplomaticFavor6}}) from each Delegation or Embassy from a foreign [[Civilizations (Civ6)|civilization]] through [[Diplomacy (Civ6)|diplomacy]]. |
||
| + | |||
| + | +1 {{EnvoyIcon6}} Envoy when built next to the [[City Center (Civ6)|City Center]]. |
||
| + | |||
| + | Enemy [[Spies (Civ6)|Spies]] operate at 2 levels below normal when targeting this district or adjacent districts. |
||
| + | |||
| + | |- |
||
| + | | style="text-align: center" |{{SurePageIconLineBreak6|Holy Site}} |
||
| ⚫ | |||
| + | | |
||
| ⚫ | |||
[[Temple (Civ6)|Temple]]<br /> |
[[Temple (Civ6)|Temple]]<br /> |
||
[[Stave Church (Civ6)|''Stave Church'']] [[File:Norwegian (Civ6).png|link=Norwegian (Civ6)|20px]]<br /> |
[[Stave Church (Civ6)|''Stave Church'']] [[File:Norwegian (Civ6).png|link=Norwegian (Civ6)|20px]]<br /> |
||
| Line 183: | Line 209: | ||
Allows Purchasing with {{Faith6}} of Religious Units. |
Allows Purchasing with {{Faith6}} of Religious Units. |
||
|- |
|- |
||
| − | |{{ |
+ | | style="text-align: center" |{{SurePageIconLineBreak6|Theater Square}} |
| − | ''{{ |
+ | |''{{SurePageIconLineBreak6|Acropolis|35}}'' [[File:Greek (Civ6).png|link=Greek (Civ6)|20px]] |
| + | | |
||
| ⚫ | |||
| ⚫ | |||
| ⚫ | |||
[[Art Museum (Civ6)|Art Museum]]<br /> |
[[Art Museum (Civ6)|Art Museum]]<br /> |
||
[[Archaeological Museum (Civ6)|Archaeological Museum]]<br /> |
[[Archaeological Museum (Civ6)|Archaeological Museum]]<br /> |
||
| Line 198: | Line 226: | ||
Buildings contain Great Work slots. |
Buildings contain Great Work slots. |
||
|- |
|- |
||
| − | |{{ |
+ | | style="text-align: center" |{{SurePageIconLineBreak6|Encampment}}''<nowiki/>'' |
| − | ''{{ |
+ | |''{{SurePageIconLineBreak6|Ikanda|35}}'' {{R&F}} [[File:Zulu (Civ6).png|link=Zulu (Civ6)|20px]] |
| + | | |
||
| ⚫ | |||
| ⚫ | |||
''[[Basilikoi Paides (Civ6)|Basilikoi Paides]]<sup>4</sup>'' [[File:Macedonian (Civ6).png|link=Macedonian (Civ6)|20px]]<br /> |
''[[Basilikoi Paides (Civ6)|Basilikoi Paides]]<sup>4</sup>'' [[File:Macedonian (Civ6).png|link=Macedonian (Civ6)|20px]]<br /> |
||
[[Stable (Civ6)|Stable]]<br /> |
[[Stable (Civ6)|Stable]]<br /> |
||
| Line 216: | Line 245: | ||
|- |
|- |
||
| + | | style="text-align: center" |{{SurePageIconLineBreak6|Harbor}} |
||
| − | |{{PageIcon6|Harbor}} |
||
| ⚫ | |||
| − | ''{{ |
+ | ''{{SurePageIconLineBreak6|Royal Navy Dockyard|35}}'' [[File:English (Civ6).png|link=English (Civ6)|20px]] |
| + | | |
||
| − | |||
| ⚫ | |||
| ⚫ | |||
| ⚫ | |||
[[Shipyard (Civ6)|Shipyard]]<br /> |
[[Shipyard (Civ6)|Shipyard]]<br /> |
||
[[Seaport (Civ6)|Seaport]] |
[[Seaport (Civ6)|Seaport]] |
||
| Line 231: | Line 260: | ||
+2 {{Gold6}} from adjacent {{Link6|City Center}}. |
+2 {{Gold6}} from adjacent {{Link6|City Center}}. |
||
| − | +1 {{ |
+ | +1 {{TradeRouteIcon6}} Trade Route capacity if the city does not have a Commercial Hub. (Vanilla only) |
Must be built on Coast or Lakes Terrain adjacent to land. |
Must be built on Coast or Lakes Terrain adjacent to land. |
||
| Line 237: | Line 266: | ||
Produced ships will appear here. Landlocked cities with this District may produce ships. |
Produced ships will appear here. Landlocked cities with this District may produce ships. |
||
| − | Removes the {{ |
+ | Removes the {{MovesIcon6}} Movement penalty for embarking and disembarking to and from this tile. |
|- |
|- |
||
| − | |{{ |
+ | | style="text-align: center" |{{SurePageIconLineBreak6|Commercial Hub}} |
| + | |{{SurePageIconLineBreak6|Suguba|35}} {{GS}} [[File:Mali (Civ6).png|link=Mali (Civ6)|20px]] |
||
| − | |||
| + | | |
||
| ⚫ | |||
| − | + | [[Market (Civ6)|Market]] |
|
''[[Sukiennice (Civ6)|Sukiennice]]''<sup>2</sup> [[File:Polish (Civ6).png|link=Polish (Civ6)|20px]]<br /> |
''[[Sukiennice (Civ6)|Sukiennice]]''<sup>2</sup> [[File:Polish (Civ6).png|link=Polish (Civ6)|20px]]<br /> |
||
| − | [[Bank (Civ6)|Bank]] |
+ | [[Bank (Civ6)|Bank]]<br /> |
| − | |||
''[[Grand Bazaar (Civ6)|Grand Bazaar]]'' {{GS}} [[File:Ottoman (Civ6).png|link=Ottoman (Civ6)|20px]]<br /> |
''[[Grand Bazaar (Civ6)|Grand Bazaar]]'' {{GS}} [[File:Ottoman (Civ6).png|link=Ottoman (Civ6)|20px]]<br /> |
||
[[Stock Exchange (Civ6)|Stock Exchange]] |
[[Stock Exchange (Civ6)|Stock Exchange]] |
||
| Line 251: | Line 279: | ||
Commerce-oriented District. Adds points towards {{Merchant6}}. |
Commerce-oriented District. Adds points towards {{Merchant6}}. |
||
| − | +2 {{Gold6}} from each adjacent river and {{link6|Harbor}} |
+ | +2 {{Gold6}} from each adjacent river and {{link6|Harbor}}.<br /> |
+1 {{Gold6}} from every 2 adjacent {{Link6|district}} tiles. |
+1 {{Gold6}} from every 2 adjacent {{Link6|district}} tiles. |
||
| − | +1 {{ |
+ | +1 {{TradeRouteIcon6}} Trade Route capacity if the city does not have a Harbor. (Vanilla only) |
|- |
|- |
||
| − | |{{ |
+ | | style="text-align: center" |{{SurePageIconLineBreak6|Industrial Zone}}''<nowiki/>'' |
| − | ''{{ |
+ | |''{{SurePageIconLineBreak6|Hansa|35}}'' [[File:German (Civ6).png|link=German (Civ6)|20px]] |
| + | | |
||
| ⚫ | |||
| ⚫ | |||
[[Factory (Civ6)|Factory]]<br /> |
[[Factory (Civ6)|Factory]]<br /> |
||
[[Electronics Factory (Civ6)|''Electronics Factory'']] [[File:Japanese (Civ6).png|link=Japanese (Civ6)|20px]]<br /> |
[[Electronics Factory (Civ6)|''Electronics Factory'']] [[File:Japanese (Civ6).png|link=Japanese (Civ6)|20px]]<br /> |
||
| − | [[Power Plant (Civ6)|Power Plant]] (Vanilla and {{R&F}} only) |
+ | [[Power Plant (Civ6)|Power Plant]] (Vanilla and {{R&F}} only)<br /> |
| ⚫ | |||
| − | |||
| − | [[ |
+ | [[Oil Power Plant (Civ6)|Oil Power Plant]] {{GS}}<br /> |
| − | |||
| ⚫ | |||
| − | |||
[[Nuclear Power Plant (Civ6)|Nuclear Power Plant]] {{GS}} |
[[Nuclear Power Plant (Civ6)|Nuclear Power Plant]] {{GS}} |
||
| |
| |
||
| Line 275: | Line 301: | ||
Some District buildings' bonuses extend to each city within 6 tiles. |
Some District buildings' bonuses extend to each city within 6 tiles. |
||
|- |
|- |
||
| − | |{{ |
+ | | style="text-align: center" |{{SurePageIconLineBreak6|Entertainment Complex}}''<nowiki/>'' |
| − | ''{{ |
+ | |''{{SurePageIconLineBreak6|Street Carnival|35}}'' [[File:Brazilian (Civ6).png|link=Brazilian (Civ6)|20px]] |
| + | | |
||
| ⚫ | |||
| + | [[Arena (Civ6)|Arena]]<br /> |
||
''[[Tlachtli (Civ6)|Tlachtli]]<sup>1</sup>'' [[File:Aztec (Civ6).png|link=Aztec (Civ6)|20px]]<br /> |
''[[Tlachtli (Civ6)|Tlachtli]]<sup>1</sup>'' [[File:Aztec (Civ6).png|link=Aztec (Civ6)|20px]]<br /> |
||
| − | [[Zoo (Civ6)|Zoo]] |
+ | [[Zoo (Civ6)|Zoo]]<br /> |
| − | |||
''[[Thermal Bath (Civ6)|Thermal Bath]]'' {{GS}} [[File:Hungarian (Civ6).png|link=Hungarian (Civ6)|20px]]<br /> |
''[[Thermal Bath (Civ6)|Thermal Bath]]'' {{GS}} [[File:Hungarian (Civ6).png|link=Hungarian (Civ6)|20px]]<br /> |
||
[[Stadium (Civ6)|Stadium]] |
[[Stadium (Civ6)|Stadium]] |
||
| Line 290: | Line 316: | ||
Some District buildings' bonuses extend to each city within 6 tiles. |
Some District buildings' bonuses extend to each city within 6 tiles. |
||
|- |
|- |
||
| − | |{{ |
+ | | style="text-align: center" |{{SurePageIconLineBreak6|Aqueduct}}''<nowiki/>'' |
| − | ''{{ |
+ | |''{{SurePageIconLineBreak6|Bath|35}}'' [[File:Roman (Civ6).png|link=Roman (Civ6)|20px]] |
| |
| |
||
| |
| |
||
| − | {{ |
+ | {{HousingIcon6}} Housing from water is increased by 2 or set to 6, whichever is higher. |
Must be built adjacent to both the City Center and one of the following: River, Lake, Oasis, or Mountain. |
Must be built adjacent to both the City Center and one of the following: River, Lake, Oasis, or Mountain. |
||
| Line 300: | Line 326: | ||
Ignores the normal population requirements for district construction. |
Ignores the normal population requirements for district construction. |
||
|- |
|- |
||
| − | |{{ |
+ | | style="text-align: center" |{{SurePageIconLineBreak6|Neighborhood}}''<nowiki/>'' |
| − | ''{{ |
+ | |''{{SurePageIconLineBreak6|Mbanza|35}}'' [[File:Kongolese (Civ6).png|link=Kongolese (Civ6)|20px]] |
| + | | |
||
| − | + | [[Food Market (Civ6)|Food Market]] {{R&F}}<br /> |
|
[[Shopping Mall (Civ6)|Shopping Mall]] {{R&F}} |
[[Shopping Mall (Civ6)|Shopping Mall]] {{R&F}} |
||
| |
| |
||
| − | Gives {{ |
+ | Gives {{HousingIcon6}} Housing based on tile's {{Link6|Appeal}}: |
* Breathtaking: +6 |
* Breathtaking: +6 |
||
| − | * Charming: +5 (The Mbanza provides this much {{ |
+ | * Charming: +5 (The Mbanza provides this much {{HousingIcon6}} Housing regardless of Appeal.) |
* Average: +4 |
* Average: +4 |
||
* Uninviting: +3 |
* Uninviting: +3 |
||
| Line 315: | Line 342: | ||
Ignores the normal population requirements for district construction. Any number of Neighborhood or Mbanza districts may be built in a city. |
Ignores the normal population requirements for district construction. Any number of Neighborhood or Mbanza districts may be built in a city. |
||
|- |
|- |
||
| − | |{{ |
+ | | style="text-align: center" |{{SurePageIconLineBreak6|Aerodrome}} |
| + | | |
||
| ⚫ | |||
| + | | |
||
| + | [[Hangar (Civ6)|Hangar]]<br /> |
||
[[Airport (Civ6)|Airport]] |
[[Airport (Civ6)|Airport]] |
||
| |
| |
||
| Line 326: | Line 355: | ||
|- |
|- |
||
| − | |{{ |
+ | | style="text-align: center" |{{SurePageIconLineBreak6|Spaceport}} |
| + | | |
||
| |
| |
||
| |
| |
||
| Line 336: | Line 366: | ||
|- |
|- |
||
| − | |{{ |
+ | | style="text-align: center" |{{SurePageIconLineBreak6|Government Plaza}} {{R&F}} |
| + | | |
||
| ⚫ | |||
| + | | |
||
| ⚫ | |||
[[Audience Chamber (Civ6)|Audience Chamber]]<br /> |
[[Audience Chamber (Civ6)|Audience Chamber]]<br /> |
||
[[Warlord's Throne (Civ6)|Warlord's Throne]]<br /> |
[[Warlord's Throne (Civ6)|Warlord's Throne]]<br /> |
||
[[Foreign Ministry (Civ6)|Foreign Ministry]]<br /> |
[[Foreign Ministry (Civ6)|Foreign Ministry]]<br /> |
||
[[Grand Master's Chapel (Civ6)|Grand Master's Chapel]]<br /> |
[[Grand Master's Chapel (Civ6)|Grand Master's Chapel]]<br /> |
||
| − | [[Intelligence Agency (Civ6)|Intelligence Agency]] |
+ | [[Intelligence Agency (Civ6)|Intelligence Agency]]<br /> |
| − | |||
''[[Queen's Bibliotheque (Civ6)|Queen's Bibliotheque]]'' {{GS}} [[File:Swedish (Civ6).png|link=Swedish (Civ6)|20px]]<br /> |
''[[Queen's Bibliotheque (Civ6)|Queen's Bibliotheque]]'' {{GS}} [[File:Swedish (Civ6).png|link=Swedish (Civ6)|20px]]<br /> |
||
[[National History Museum (Civ6)|National History Museum]]<br /> |
[[National History Museum (Civ6)|National History Museum]]<br /> |
||
| Line 360: | Line 391: | ||
|- |
|- |
||
| − | |{{ |
+ | | style="text-align: center" |{{SurePageIconLineBreak6|Water Park}} {{R&F}}''<nowiki/>'' |
| − | ''{{ |
+ | |''{{SurePageIconLineBreak6|Copacabana|35}}'' {{R&F}} [[File:Brazilian (Civ6).png|link=Brazilian (Civ6)|20px]] |
| + | | |
||
| ⚫ | |||
| + | [[Ferris Wheel (Civ6)|Ferris Wheel]]<br /> |
||
[[Aquarium (Civ6)|Aquarium]]<br /> |
[[Aquarium (Civ6)|Aquarium]]<br /> |
||
[[Aquatics Center (Civ6)|Aquatics Center]] |
[[Aquatics Center (Civ6)|Aquatics Center]] |
||
| Line 373: | Line 405: | ||
|} |
|} |
||
<sup>1</sup> Preorder DLC. Became available for all players free of charge 90 days after the release of the game.<br /> |
<sup>1</sup> Preorder DLC. Became available for all players free of charge 90 days after the release of the game.<br /> |
||
| − | <sup>2</sup> Added in [[Poland Civilization & Scenario Pack (Civ6)|Poland Civilization & Scenario Pack]] |
+ | <sup>2</sup> Added in [[Poland Civilization & Scenario Pack (Civ6)|Poland Civilization & Scenario Pack]].<br /> |
| − | <sup>3</sup> Added in [[Australia Civilization & Scenario Pack (Civ6)|Australia Civilization & Scenario Pack]] |
+ | <sup>3</sup> Added in [[Australia Civilization & Scenario Pack (Civ6)|Australia Civilization & Scenario Pack]].<br /> |
| − | <sup>4</sup> Added in [[Persia and Macedon Civilization & Scenario Pack (Civ6)|Persia and Macedon Civilization & Scenario Pack]] |
+ | <sup>4</sup> Added in [[Persia and Macedon Civilization & Scenario Pack (Civ6)|Persia and Macedon Civilization & Scenario Pack]].<br /> |
| − | <sup>5</sup> Added in [[Nubia Civilization & Scenario Pack (Civ6)|Nubia Civilization & Scenario Pack]] |
+ | <sup>5</sup> Added in [[Nubia Civilization & Scenario Pack (Civ6)|Nubia Civilization & Scenario Pack]].<br /> |
| − | <sup>6</sup> Added in [[Khmer and Indonesia Civilization & Scenario Pack (Civ6)|Khmer and Indonesia Civilization & Scenario Pack]] |
+ | <sup>6</sup> Added in [[Khmer and Indonesia Civilization & Scenario Pack (Civ6)|Khmer and Indonesia Civilization & Scenario Pack]]. <br/> |
| + | <sup>7</sup> Added in [[Ethiopia Pack (Civ6)|Ethiopia Pack]]. <br/> |
||
| − | |||
{{RiseandFall}} |
{{RiseandFall}} |
||
{{GatheringStorm}} |
{{GatheringStorm}} |
||
| + | </onlyinclude> |
||
== Strategy == |
== Strategy == |
||
| Line 401: | Line 434: | ||
* It provides a Standard [[Adjacency bonus (Civ6)|Adjacency bonus]] to other nearby districts, '''in addition '''to the Minor one, and |
* It provides a Standard [[Adjacency bonus (Civ6)|Adjacency bonus]] to other nearby districts, '''in addition '''to the Minor one, and |
||
* It provides +8 [[Loyalty (Civ6)|Loyalty]] to its city. |
* It provides +8 [[Loyalty (Civ6)|Loyalty]] to its city. |
||
| − | Plus, its {{Production6}} cost is roughly half that of other districts, which makes it easy to construct even in newly-established cities! However, you can only have a single Government Plaza in your Empire, so you have to think very well where and '''when '''construct it. You could choose to build it ASAP, which most probably will mean having it in your {{Capital6}} |
+ | Plus, its {{Production6}} cost is roughly half that of other districts, which makes it easy to construct even in newly-established cities! However, you can only have a single Government Plaza in your Empire, so you have to think very well where and '''when '''construct it. You could choose to build it ASAP, which most probably will mean having it in your {{Capital6}}. This will give you early access to the extra Governor titles, which could be priceless. However, you will forego the Loyalty boost effect, which will be useless in the Capital. Or, you could wait a bit and build it in a fringe city. where the Loyalty boost will matter, but you may have troubles constructing the Buildings of the district (which, unlike the district itself, are very expensive, and can't be bought with {{Gold6}}) - this will have the unwanted side effect of delaying access to their awesome bonuses. But whatever you do, try to build it in such a way as to be able to build other districts around it, in order to use the Standard Adjacency bonus. The ideal location would be somewhere between a [[River (Civ6)|River]] and a [[Mountains (Civ6)|Mountain]], in a flat area - this way you can construct a [[Commercial Hub (Civ6)|Commercial Hub]], a [[Campus (Civ6)|Campus]], and possibly an [[Industrial Zone (Civ6)|Industrial Zone]] nearby, all with their respective bonuses activated and enhanced by the Plaza. |
In the [[Classical Era (Civ6)|Classical Era]] the rest of the main districts will be unlocked (save one): the [[Theater Square (Civ6)|Theater Square]], [[Commercial Hub (Civ6)|Commercial Hub]], [[Harbor (Civ6)|Harbor]], as well as the less important [[Entertainment Complex (Civ6)|Entertainment Complex]]. Of these the most important, maybe the second most important overall after the Campus and Holy Site, is the Commercial Hub - besides an easily-activated {{Gold6}} Adjacency bonus, it allows an additional [[Trade Route (Civ6)|Trade Route]], which is sorely needed by everyone, and starts your progress towards [[Great Merchant (Civ6)|Great Merchants]] - one of the universally useful Great People in the game. However, seafaring civs will want a Harbor instead of a Commercial Hub- its benefits are even greater, especially for cities along the Coast. And of course, the Theater Square will boost civic development for everyone. It is, however, especially important for players which pursue a Cultural victory - both for the Great Person points it provides (one for each culturally-oriented Great Person), and for the Great Work slots. They might consider building it as their second district, if they could progress fast enough. |
In the [[Classical Era (Civ6)|Classical Era]] the rest of the main districts will be unlocked (save one): the [[Theater Square (Civ6)|Theater Square]], [[Commercial Hub (Civ6)|Commercial Hub]], [[Harbor (Civ6)|Harbor]], as well as the less important [[Entertainment Complex (Civ6)|Entertainment Complex]]. Of these the most important, maybe the second most important overall after the Campus and Holy Site, is the Commercial Hub - besides an easily-activated {{Gold6}} Adjacency bonus, it allows an additional [[Trade Route (Civ6)|Trade Route]], which is sorely needed by everyone, and starts your progress towards [[Great Merchant (Civ6)|Great Merchants]] - one of the universally useful Great People in the game. However, seafaring civs will want a Harbor instead of a Commercial Hub- its benefits are even greater, especially for cities along the Coast. And of course, the Theater Square will boost civic development for everyone. It is, however, especially important for players which pursue a Cultural victory - both for the Great Person points it provides (one for each culturally-oriented Great Person), and for the Great Work slots. They might consider building it as their second district, if they could progress fast enough. |
||
| − | At this early stage of the game, the Entertainment Complex can be important in 2 cases: for aggressive conquerors which have problems with {{ |
+ | At this early stage of the game, the Entertainment Complex can be important in 2 cases: for aggressive conquerors which have problems with {{AmenitiesIcon6}} Amenities, and for cities with [[Loyalty (Civ6)|Loyalty]] problems. Later, Entertainment Complexes could turn into nice boosters for 'special' city stats, such as {{Tourism6}}, also cities with [[Rainforest (Civ6)|Rainforests]] can use the [[Zoo (Civ6)|Zoo]] to get {{Science6}} yields there. But there is one more use for these districts: a Loyalty flip! Build them in border cities with good {{Citizen6}} Population, then use their Bread and Games project to apply Loyalty pressure to your neighbors, and maybe eventually flip them to your civ! |
The last of the 'main' districts, the [[Industrial Zone (Civ6)|Industrial Zone]] unlocks in the early [[Medieval Era (Civ6)|Medieval Era]]. Its {{Production6}} bonuses benefit all strategies, so constructing it is a no-brainer. However, try to plan strategically and build a Zone within 6 tiles of multiple cities, so that you could use it to generate {{Power6}} for them. |
The last of the 'main' districts, the [[Industrial Zone (Civ6)|Industrial Zone]] unlocks in the early [[Medieval Era (Civ6)|Medieval Era]]. Its {{Production6}} bonuses benefit all strategies, so constructing it is a no-brainer. However, try to plan strategically and build a Zone within 6 tiles of multiple cities, so that you could use it to generate {{Power6}} for them. |
||
| Line 433: | Line 466: | ||
When a city is ready to construct something, the Choose Production button will appear. If a district can be constructed, it will appear on this menu. Click on the district to order the city to begin construction, opening the district placement lens. Here, you will be given an overview of the different yield outcomes available on the tiles surrounding your City Center, and you can better make a decision about where to place your district. This lens will also show you which tiles are unavailable, as some districts have very specific placement requirements (for example, the Encampment cannot be built adjacent to a City Center). Furthermore, all districts must be built within 3 tiles of a City Center. |
When a city is ready to construct something, the Choose Production button will appear. If a district can be constructed, it will appear on this menu. Click on the district to order the city to begin construction, opening the district placement lens. Here, you will be given an overview of the different yield outcomes available on the tiles surrounding your City Center, and you can better make a decision about where to place your district. This lens will also show you which tiles are unavailable, as some districts have very specific placement requirements (for example, the Encampment cannot be built adjacent to a City Center). Furthermore, all districts must be built within 3 tiles of a City Center. |
||
| − | Districts may be placed on top of features such as Woods or Rainforest if you have the technology to remove those features, but for a longer construction time. No District can be built on a floodplain. |
+ | Districts may be placed on top of features such as Woods or Rainforest if you have the technology to remove those features, but for a longer construction time. No District can be built on a floodplain. |
==Related achievements== |
==Related achievements== |
||
Revision as of 12:16, 6 August 2020
![]() Back to Civilization VI
Back to Civilization VI
![]() Back to City
Back to City
A ![]() district is one of the many parts of a city in Civilization VI that manifests the city's development and specialization over time. Districts are a brand new feature in Civilization VI.
district is one of the many parts of a city in Civilization VI that manifests the city's development and specialization over time. Districts are a brand new feature in Civilization VI.
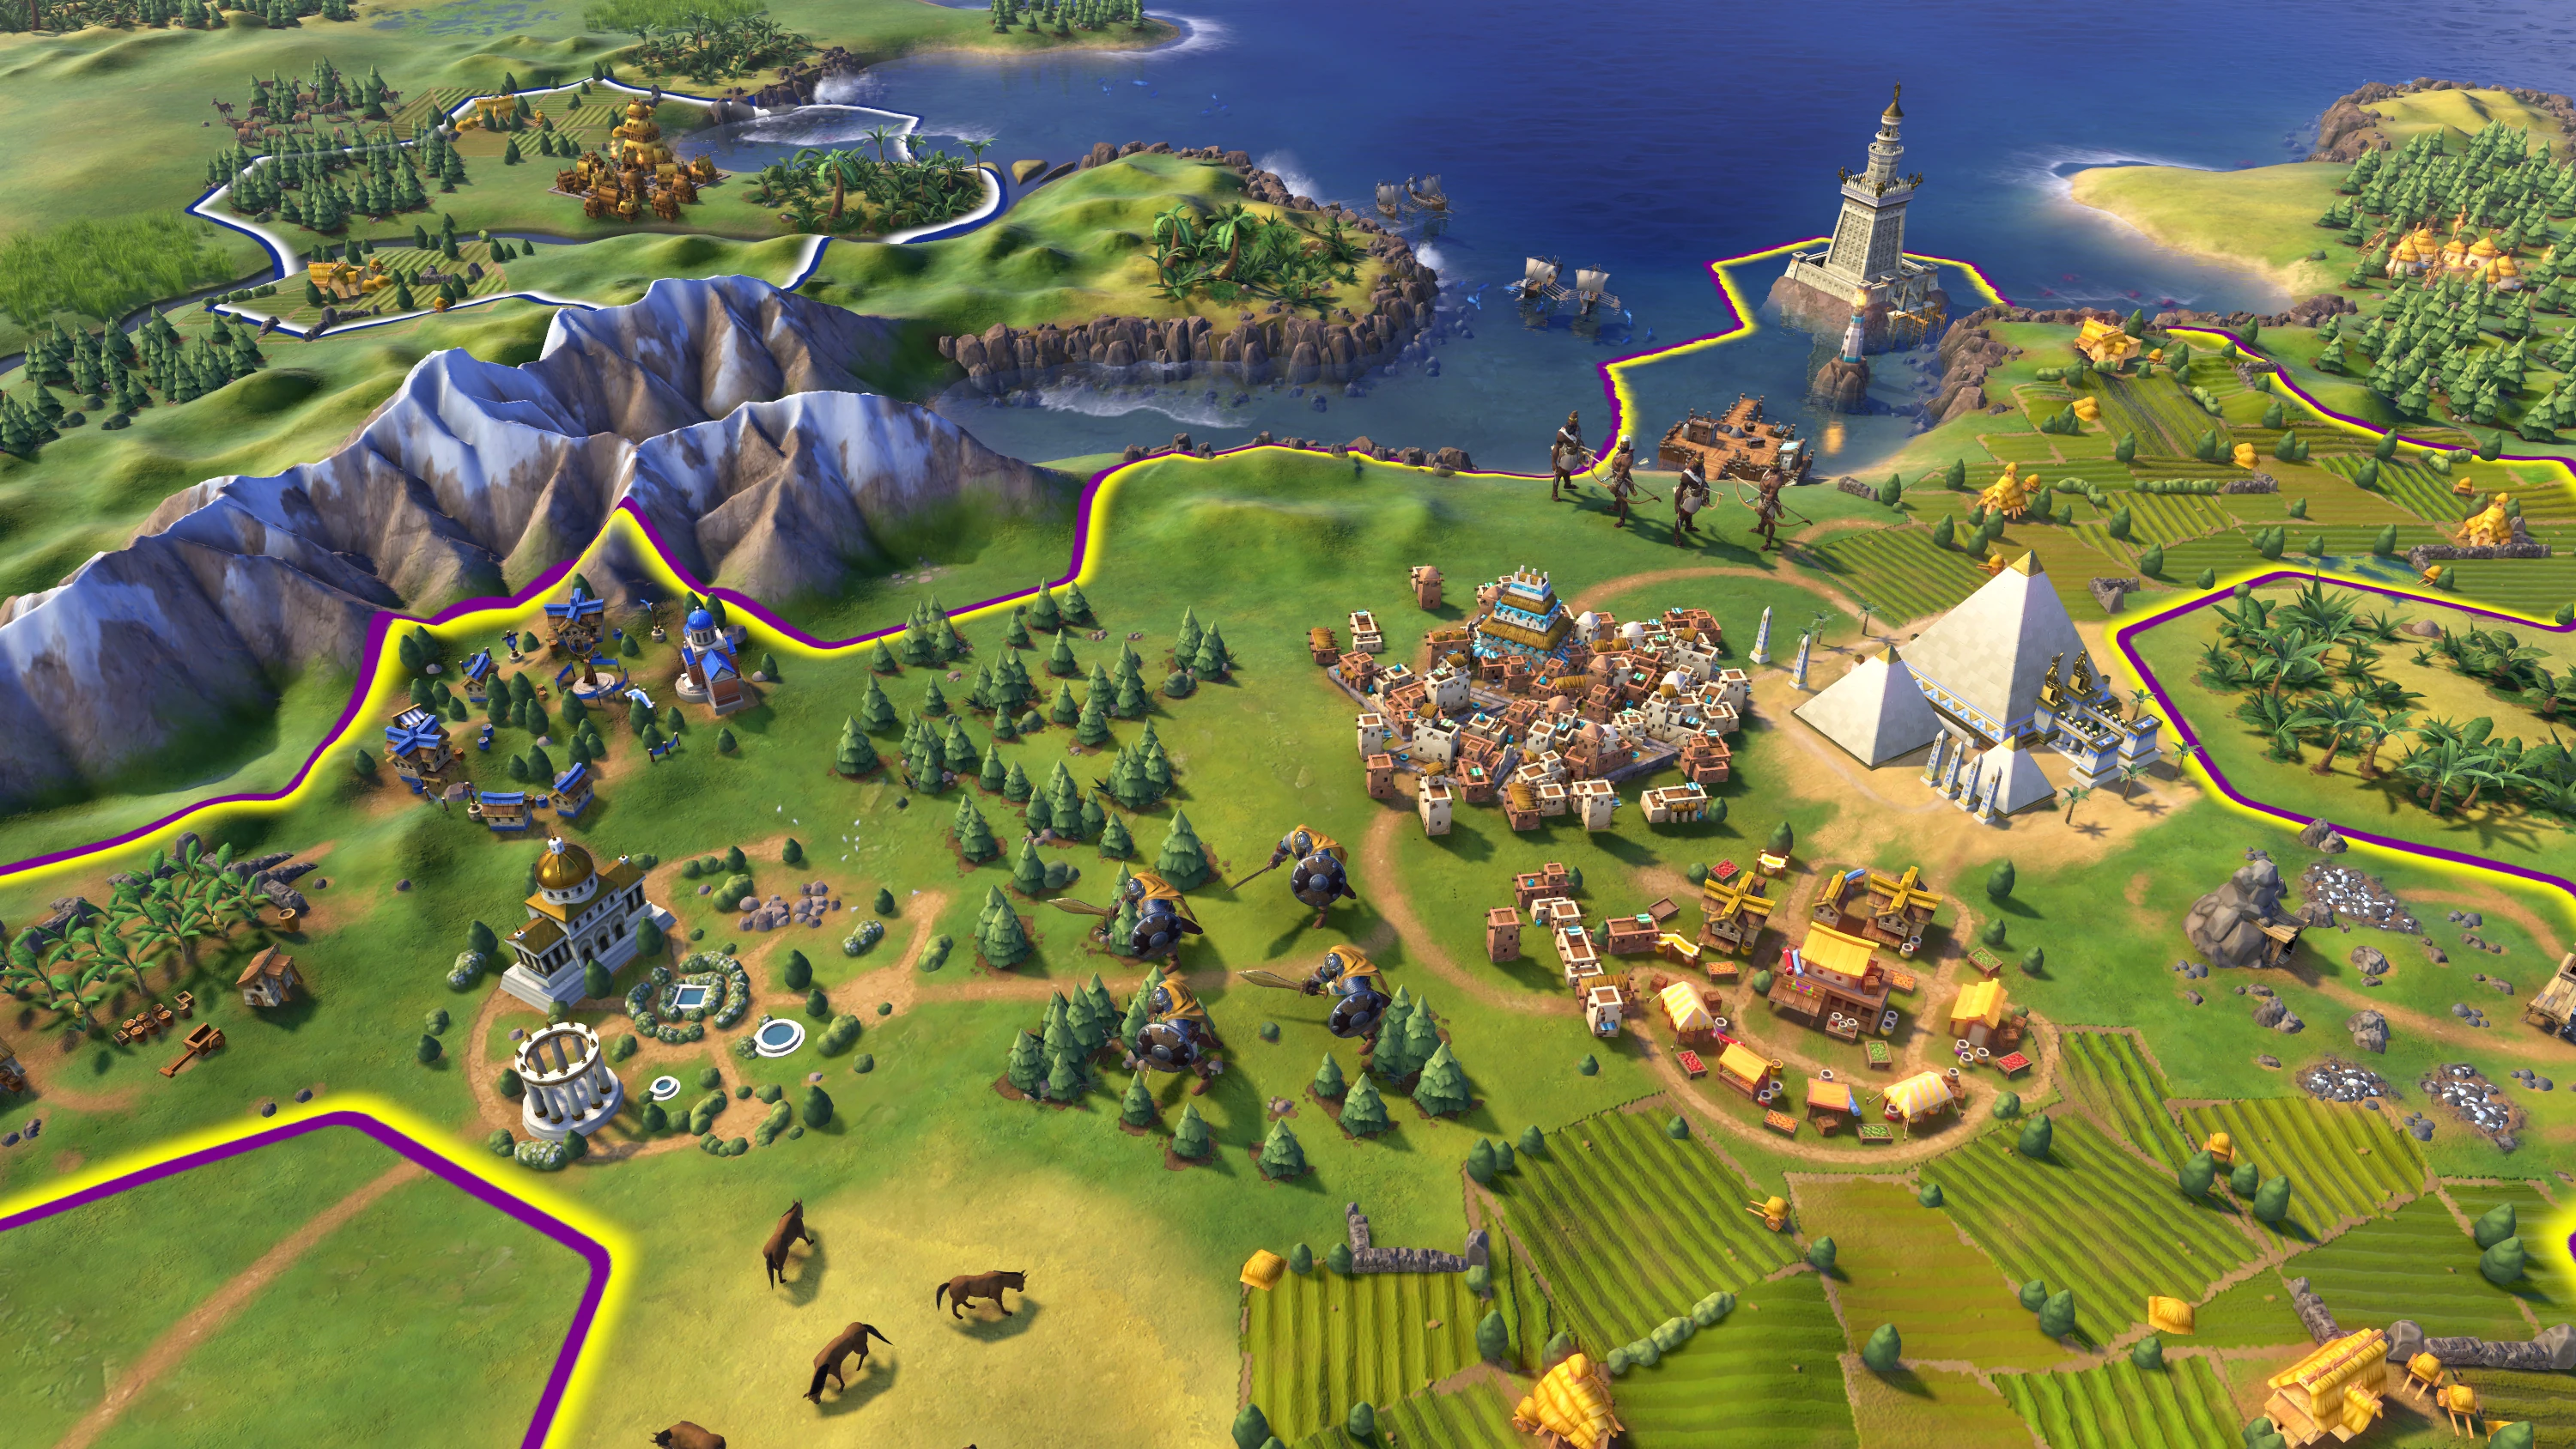
Districts and World Wonders around a city
What is a District?
A district is a distinct part of a city which is found on terrain outside the city center (i.e. the city's main tile), and which focuses on developing some gameplay aspect in this city. Think of it as a visual manifestation of the implied parts of a city in other Civilization games: a military part, a scientific part, a cultural part, etc. Civilization VI emphasizes these parts, giving them autonomy outside the City Center, and making them at the same time more powerful and more vulnerable to enemy attacks. Most Buildings of a city are now built in these Districts outside its center, where only the most essential ones (such as the Monument and Granary) reside.
Once built, districts will confer stat yields, bonuses and unlock new possibilities for their parent city, such as the ability to build certain buildings and possibly units. What's more, buildings that are related to a certain district will appear in the district itself rather than the city-center tile. Your Library and University, for example, will appear in your Campus district (the ![]() Science-oriented part of the city), not in the main city. Similarly, once you've built an Encampment district, your military units will start appearing there, instead of in the main city. Once you've built a Harbor district, you will be able to build ships there, even though your city center is away from the shore.
Science-oriented part of the city), not in the main city. Similarly, once you've built an Encampment district, your military units will start appearing there, instead of in the main city. Once you've built a Harbor district, you will be able to build ships there, even though your city center is away from the shore.
Most Districts are "Specialty Districts"; that is, they fulfill a specific gameplay role, not technically related to the city's basic functioning. They are subject to population constraints, meaning that the current ![]() Population of the city will determine the maximum number of Specialty districts which it may construct. Specialty districts confer a number of other bonuses to their city (for example, additional
Population of the city will determine the maximum number of Specialty districts which it may construct. Specialty districts confer a number of other bonuses to their city (for example, additional ![]() Combat Strength) and determine its eligibility for many Policies' bonuses. All Specialty districts also have a project attached to them: these projects are undertaken from the city production queue, and upon completion award a set amount of yields and
Combat Strength) and determine its eligibility for many Policies' bonuses. All Specialty districts also have a project attached to them: these projects are undertaken from the city production queue, and upon completion award a set amount of yields and ![]() Great Person points (depending on the district), and may be done as many times as desired.
Great Person points (depending on the district), and may be done as many times as desired.
There are also the so-called 'engineering' districts (like the Aqueduct, the Neighborhood or the Dam in Gathering Storm), which are exceptional - despite being built outside of the City Center they are considered an integral part of the city systems, and may be built in any city where the necessary prerequisites are met, regardless of ![]() Population and how many other Districts it has. Also, in Gathering Storm, the construction of these districts can be rushed by Military Engineers.
Population and how many other Districts it has. Also, in Gathering Storm, the construction of these districts can be rushed by Military Engineers.
Different districts are unlocked over time via technical or civic development. Check individual articles for specifics.
Building a District
Districts are built via the normal production process of the city - just look in the Production list. Of course, you will need first to make the necessary technological or civic advancements to unlock the district. Next, since Districts are built outside the City Center, you will also need a suitable plot of land. Finally, for Specialty districts you will need to increase the city's ![]() Population first. New cities won't have enough citizens to populate and work a separate district; over time, this situation will change, and you will be able to choose to add a district to the city, instead of, say, build a building or a unit. Starting from
Population first. New cities won't have enough citizens to populate and work a separate district; over time, this situation will change, and you will be able to choose to add a district to the city, instead of, say, build a building or a unit. Starting from ![]() Population of 1, each 3 additional
Population of 1, each 3 additional ![]() Citizens allow support for one additional District (so 4, 7, etc.).
Citizens allow support for one additional District (so 4, 7, etc.).
Note that each Specialty District may only be built once in a city! This is also valid for non-Specialty Districts, the only exception being the Neighborhood and the Canal. Also, once you choose a place for a District, even though you haven't finished building it yet, you will be unable to alter your choice! These two facts mean that you should really think very carefully before placing your Districts, so as to maximize your future gains and prevent conflicts of interests (for example with Wonders).
Suitable locations
After you unlock a District and have enough ![]() Population to build it, just select it from them menu and an interface will appear in order to select a location. Valid locations will be highlighted in green. Each city can only build districts on tiles which are included in its own territory. You cannot place districts in other cities' territory, even if these other cities belong to you and the tile in question is up to three tiles away from the City Center!
Population to build it, just select it from them menu and an interface will appear in order to select a location. Valid locations will be highlighted in green. Each city can only build districts on tiles which are included in its own territory. You cannot place districts in other cities' territory, even if these other cities belong to you and the tile in question is up to three tiles away from the City Center!
You cannot place a District on Floodplains Terrain (not applicable in Gathering Storm - there you can construct districts on all types of Floodplains), on a tile with a Strategic or Luxury Resource, a tile containing an ![]() Antiquity Site or a
Antiquity Site or a ![]() Shipwreck (you may use these tiles later, after you excavate its
Shipwreck (you may use these tiles later, after you excavate its ![]() Artifact), or a tile containing another District or Wonder. The tile may contain a Bonus Resource, but it will be removed on placement, so you should either reconsider the placement or Harvest the resource beforehand.
Artifact), or a tile containing another District or Wonder. The tile may contain a Bonus Resource, but it will be removed on placement, so you should either reconsider the placement or Harvest the resource beforehand.
Note that hidden Strategic resources do not block placement of districts! After you develop technologies later which reveal them, it's often the case that you've built a district in a tile with a Strategic Resource. In this case you will be granted access to that resource, even though you don't have the appropriate improvement on it, and even though you haven't discovered the appropriate technology to access it (which is the case with ![]() Oil when found in the sea - its access technology is more advanced than the one revealing it).
Oil when found in the sea - its access technology is more advanced than the one revealing it).
Districts can only be built on "clean" land. Any removable feature (Woods, Rainforest or Marsh) will be removed at placement, if you have the respective technology...and if you don't, you won't be able to place the District there. Furthermore, the Harbor and Water Park Districts may only be placed on a Sea Coast tile adjacent to land; the Aerodrome and Spaceport Districts may only be placed on flat land (no Hills!), and the Encampment District cannot be placed next to the City Center. Also, the Aqueduct district must be placed adjacent to both the City Center and to a tile with River, Lake, Oasis or Mountain. The idea here is that you can decide for strategic purposes to Found a City close to, but not adjacent to these features, and later connect the city to them by an Aqueduct to get the Fresh Water ![]() Housing bonus. In Gathering Storm, Dam districts may only be placed on a floodplain tile of the same river the city is built on, and Canal districts may be placed so as to connect bodies of water either with other bodies of water or with a City Center.
Housing bonus. In Gathering Storm, Dam districts may only be placed on a floodplain tile of the same river the city is built on, and Canal districts may be placed so as to connect bodies of water either with other bodies of water or with a City Center.
Finally, note that the native yields of the target tile will be removed, and replaced later with yields associated with the District itself (Adjacency bonus yields, as well as Specialist yields). So, take care where you place your districts! Theoretically, the best locations for Districts are tiles with little or no native yield, such as Desert or Tundra. But of course, you should pay attention to the Adjacency bonuses (current and potential) first and foremost.
The perfect location for a District will depend on many additional factors. When you choose to build a District, a special lens will appear, showing the city and its surroundings. Possible locations for the new district will be highlighted, along with some special info:
- Little icons, combined with colored arrows show possible Adjacency bonuses. These depend wildly on the type of District you're attempting to place; one common icon, a 5-point Star, signifies "Bonus from Districts". Pay attention to these, as they may show you how you can expand Adjacency bonuses in the future.
- A red exclamation mark means that an existing feature will be removed if you place a District there. This feature may include Terrain features such as Woods, Resources, or an Improvement.
- A yield icon and a number (+1, +2 and more) means that if you place a District in this tile, it will benefit from bonus yields. Mouse over to see exactly what affects these bonuses.
Note that, once placed, a District cannot be removed in any way barring Razing the city!
Production cost
The ![]() Production cost of a District is progressive, starting from a "base price" in the beginning of the game. Each technology or civic you research increases the price by the following formula:
Production cost of a District is progressive, starting from a "base price" in the beginning of the game. Each technology or civic you research increases the price by the following formula:

In simpler language, the price is determined by the percentage of the total techs or civics you've researched, whichever is greater. The more techs or civics you have researched, the more expensive District construction is.
The base price for most Districts is 54 ![]() Production, with the exception of the Aqueduct (whose base cost is 36
Production, with the exception of the Aqueduct (whose base cost is 36 ![]() Production), the Government Plaza (whose base cost is 30
Production), the Government Plaza (whose base cost is 30 ![]() Production), and the Spaceport (whose base cost is 1800
Production), and the Spaceport (whose base cost is 1800 ![]() Production, equaling it to a Wonder). As a result of price scaling, Districts become increasingly more difficult to construct as the game progresses. For old, big cities this isn't such a problem, usually, (since their
Production, equaling it to a Wonder). As a result of price scaling, Districts become increasingly more difficult to construct as the game progresses. For old, big cities this isn't such a problem, usually, (since their ![]() Production potential also increases gradually), but for newly established cities in the Modern and later Eras it becomes a great hindrance. So, it is highly important to place your districts the moment your city population and the relevant tech allows, or you risk wasting construction time unnecessarily. This means you need to plan ahead of time where and in what order you want to build your districts in each city. Usually, there is a generic ordering based on the phase of the game and the victory type you are pursuing. Check out the pages for each district for detailed strategy.
Production potential also increases gradually), but for newly established cities in the Modern and later Eras it becomes a great hindrance. So, it is highly important to place your districts the moment your city population and the relevant tech allows, or you risk wasting construction time unnecessarily. This means you need to plan ahead of time where and in what order you want to build your districts in each city. Usually, there is a generic ordering based on the phase of the game and the victory type you are pursuing. Check out the pages for each district for detailed strategy.
Districts apart from the City Center, Aqueduct, Canal, Dam, Spaceport and Neighborhood can be discounted 40%, with the exception of the Government Plaza, which has a discount of 25%. This discount occurs when the total number of completed districts divided by the districts researched is at least 1 and this average number rounded up is larger than the current number of the type of district you want to place. This current number includes unfinished districts. When a district is finished a tech or civic must be completed to update the formula. This discount can save a significant amount of production early if used correctly but is restrictive in some ways.A full guide can be found here [1]
Constructing Districts, and Buildings can be accelerated via Industrial City-states. The ![]() Capital gains a +2
Capital gains a +2 ![]() Production bonus from every such City-State where you have at least 1
Production bonus from every such City-State where you have at least 1 ![]() Envoy. All other cities which have an Industrial Zone will gain +2
Envoy. All other cities which have an Industrial Zone will gain +2 ![]() Production bonus from every such City-State where you have 3
Production bonus from every such City-State where you have 3 ![]() Envoys, and another +2
Envoys, and another +2 ![]() Production if you have 6
Production if you have 6 ![]() Envoys.
Envoys.
Each District you construct will come with a Road improvement underneath, starting with the City Center.
District Mechanics
Each District in the game is focused on a particular gameplay aspect. For example, the Campus is focused on ![]() Science, and the Theater Square on
Science, and the Theater Square on ![]() Culture. If you manage to activate their Adjacency bonuses, these Districts will start contributing a particular yield related to their gameplay aspect (
Culture. If you manage to activate their Adjacency bonuses, these Districts will start contributing a particular yield related to their gameplay aspect (![]() Science from the Campus,
Science from the Campus, ![]() Culture for the Theater Square, etc.) even before you construct any Buildings in them. These yields may be enhanced further through Social Policies. For more information, see below. Furthermore, most Districts will immediately start contributing
Culture for the Theater Square, etc.) even before you construct any Buildings in them. These yields may be enhanced further through Social Policies. For more information, see below. Furthermore, most Districts will immediately start contributing ![]() Great Person points towards a specific Great Person aligned with the District's domain; for example, the Campus will contribute towards a Great Scientist.
Great Person points towards a specific Great Person aligned with the District's domain; for example, the Campus will contribute towards a Great Scientist.
There are also some districts which may be better described as engineering projects: the Aqueduct, Dam, Canal and the Neighborhood. They are more simple districts which serve specific purposes, such as providing Fresh Water to the city, or protecting it from floods.
As mentioned above, most Districts unlock specific Buildings associated with them. In fact, even the main city is now considered a separate District, called a City Center. The Monument, Granary and all other buildings available to a city right from the start are actually available only because they are associated with the only District this city has for now, the City Center. So, when you build additional Districts later, all Buildings associated with them will also unlock.
Buildings add more functionality to Districts. This usually means more of the yield the District is focused on, but it may also mean additional ![]() Housing, certain type of Great Person Points, and also additional
Housing, certain type of Great Person Points, and also additional ![]() Citizen slots where you can assign Specialists. This is particularly important for very large cities, as they won't have enough terrain slots to put their Citizens to work. Building special Buildings in your Districts will provide you with alternative occupations for your Citizen workforce.
Citizen slots where you can assign Specialists. This is particularly important for very large cities, as they won't have enough terrain slots to put their Citizens to work. Building special Buildings in your Districts will provide you with alternative occupations for your Citizen workforce.
Tier 3 buildings are the most advanced, and besides a slew of bonuses usually add a ![]() Power requirement to the city (in Gathering Storm only, of course). After the June 2019 Update the Tier 3 building of Specialty districts will also enhance Specialist yields for the entire district!
Power requirement to the city (in Gathering Storm only, of course). After the June 2019 Update the Tier 3 building of Specialty districts will also enhance Specialist yields for the entire district!
District Adjacency Bonuses
Most Specialty districts may gain additional bonuses from features which surround it: terrain (such as mountains or jungle), Wonders, Tile Improvements or even other districts. For example, a Campus (the research district) will get a bonus for each adjacent mountain and jungle tile, because they are useful to scientists; while a Holy Site (the religious district) will get bonuses from adjacent Natural Wonders and woods, which help inspire people. These adjacency bonuses may also extend to certain buildings within the district (particularly unique buildings). You should study the individual requirements of each district and plan its placement accordingly!
Production-oriented Districts
Certain Districts are focused on producing specific types of units: the Encampment is focused on land unit production, the Harbor on naval unit production, and the Aerodrome on airplane production. After building these Districts in a city, all relevant units will be built there in the future, not in the City Center. What's more, in certain circumstances these districts are required for you to be able to produce units:
- Air units may only be produced in a city with an Aerodrome District.
- (Vanilla Civilization VI and Rise and Fall): Naval units which require certain strategic resources, of which you only have 1 count, may only be produced in a city with a Harbor (even if the city itself is on the coast). This restriction is lifted if you have 2 counts of the resource.
- (Vanilla Civilization VI and Rise and Fall): Land units which require certain strategic resources, of which you only have 1 count, may only be produced in a city with an Encampment. This restriction is lifted if you have 2 counts of the resource.
There are several more situations where production of a certain unit requires a District:
- Religious units may only be produced in a city with a Holy Site, and certain buildings in it (Shrine for the Missionary, Temple for the other units).
- An Archaeologist may only be produced in a city with a Theater Square with an Archaeological Museum. In addition, only 1 Archaeologist may exist per city at the same time.
Buildings in production-oriented Districts confer a bonus to experience (that is, the rate at which the units earn experience) for certain or all units of the particular domain produced in this city. For example buildings in a Harbor will confer experience bonus to all ships built in the city, while an Encampment - a bonus to all land units (although there's a further distinction based on whether you constructed a Barracks or Stable in the District).
The final buildings of the Encampment and Harbor Districts, respectively the Military Academy and the Seaport permit building of units as Formations (Corps, Armada, etc.). They also boost the Production speed of these Formations, so as to be cheaper and faster to build Formations than individual units!
Area-effect Bonuses
Finally, the effects of certain district-specific Buildings extend not only to their own city, but also to all other cities whose City Center is up to 6 tiles away from the relevant District. This is the case with the Factory, the Zoo and some other buildings. To make best use of this ability, try to make cities close to other cities' Industrial or Entertainment centers - they will greatly benefit their neighbors!
In Gathering Storm Power Plants also produce ![]() Power for all cities within 6 tiles.
Power for all cities within 6 tiles.
Note that bonuses from the same type of buildings in different Districts do not stack. Thus, if you have two Factories within 6 tiles of two different City Centers, both these cities will get only a +3 ![]() Production bonus, not +6.
Production bonus, not +6.
Unique Districts
Some civilizations possess unique districts that replace generic ones. For example, the Greek Acropolis replaces the Theater Square. As a rule, unique districts cost half the ![]() Production to build (as compared to normal ones). Note that unique districts follow the rules of the district they replace in regard to population requirements to build. For example, Germany's Hansa district replaces the Industrial Zone specialty district and does have a population requirement. However, Roman Bath districts replace Aqueducts and do not have a population requirement since Aqueducts do not have a population requirement.
Production to build (as compared to normal ones). Note that unique districts follow the rules of the district they replace in regard to population requirements to build. For example, Germany's Hansa district replaces the Industrial Zone specialty district and does have a population requirement. However, Roman Bath districts replace Aqueducts and do not have a population requirement since Aqueducts do not have a population requirement.
Unique Districts often have more powerful - or outright different - Adjacency Bonuses than the normal Districts they replace. Read their descriptions carefully before deciding where to place them!
When a city with a Unique district changes hands (gets conquered by another civ), this District will revert to its generic equivalent. For example, the Acropolis will turn into a normal Theater Square.
From Rise and Fall onward, the first copy of a unique district grants 4 Era Score; however, there is a difference between two "types" of unique district:
- The unique version of districts that have adjacency bonuses (Seowon, Lavra, Acropolis, Hansa, Cothon, Royal Navy Dockyard, Suguba, Observatory) will only grant Era Scores for building it. You will not get extra Era Scores for high starting adjacency bonus. (i.e. Korea cannot unlock the Splendid Campus historic moment even though their Seowon can start with +4
 Science)
 - The unique version of districts that do not have adjacency bonuses (Ikanda, Street Carnival, Copacabana) will grant Era Scores when built and will still grant more Era Scores when you build all three tiers of building in them.
- Mbanza is an exception. It only grants Era Scores when built but will not unlock the First Neighborhood historic moment.
Types of Districts
The names of unique districts and buildings are italicized in the table.
| District | Unique District | Buildings | Adjacency Bonuses/Effects |
|---|---|---|---|
City Center |
Granary |
5 Aircraft Capacity: 1 Tile is always worked for free. Yields are at least 2 | |
Campus |
Observatory |
Science-oriented District. Adds points towards +1 +2 +2 | |
Canal |
Allows passage of naval and embarked units between bodies of water or through a City Center.
Ignores the normal population requirements for district construction. Any number of Canal districts may be built in a city. Shortens maritime | ||
Dam |
Hydroelectric Dam |
Provides +3 Prevents Flood damage on this River, and reduces yields from Floods by 50%. Also prevents Ignores the normal population requirements for district construction. Only the first Dam to be built on a river will receive benefits from a Dam. | |
Diplomatic Quarter7 |
Consulate | Diplomacy and espionage-oriented District.
+1 +1 Enemy Spies operate at 2 levels below normal when targeting this district or adjacent districts. | |
Holy Site |
Lavra |
Faith-oriented District. Adds points towards +2 Allows Purchasing with | |
Theater Square |
Acropolis |
Amphitheater |
Culture-oriented District. Adds points towards +2 Buildings contain Great Work slots. |
Encampment |
Ikanda |
Barracks |
Military District. Adds points towards Has a defense value and can fight as the City Center. Produced military units appear here. Cannot be built next to the City Center. |
Harbor |
Cothon |
Seafaring District. Adds points towards +1 +1 Must be built on Coast or Lakes Terrain adjacent to land. Produced ships will appear here. Landlocked cities with this District may produce ships. Removes the | |
Commercial Hub |
Suguba |
Commerce-oriented District. Adds points towards +2 +1 | |
Industrial Zone |
Hansa |
Workshop |
Production-oriented District. Adds points towards +1 Some District buildings' bonuses extend to each city within 6 tiles. |
Entertainment Complex |
Street Carnival |
Amenity-boosting district. Mutually exclusive with Water Park. +1 Some District buildings' bonuses extend to each city within 6 tiles. | |
Aqueduct |
Bath |
Must be built adjacent to both the City Center and one of the following: River, Lake, Oasis, or Mountain. Ignores the normal population requirements for district construction. | |
Neighborhood |
Mbanza |
Gives
Ignores the normal population requirements for district construction. Any number of Neighborhood or Mbanza districts may be built in a city. | |
Aerodrome |
Aircraft-building District (only cities with this District may built aircraft). Cannot be built on Hills. Aircraft Capacity: +4 (+4 more with Buildings) (Aircraft Capacity: +2 (+2 more with Buildings) | ||
Spaceport |
Enables projects leading to the Science Victory. Cannot be built on Hills. Ignores the normal population requirements for district construction. | ||
Government Plaza |
Ancestral Hall |
Unique District. May only be built once per civilization. +8 Loyalty to this city. +1 adjacency bonus to all adjacent districts. +1 Governor Title. Buildings provide varied powerful gameplay bonuses, but only one building per tier is allowed. | |
Water Park |
Copacabana |
Amenity-boosting district. Mutually exclusive with Entertainment Complex. +1 Some District buildings' bonuses extend to each city within 9 tiles. |
1 Preorder DLC. Became available for all players free of charge 90 days after the release of the game.
2 Added in Poland Civilization & Scenario Pack.
3 Added in Australia Civilization & Scenario Pack.
4 Added in Persia and Macedon Civilization & Scenario Pack.
5 Added in Nubia Civilization & Scenario Pack.
6 Added in Khmer and Indonesia Civilization & Scenario Pack.
7 Added in Ethiopia Pack.
![]() Added in the Rise and Fall expansion pack.
Added in the Rise and Fall expansion pack.
![]() Added in the Gathering Storm expansion pack.
Added in the Gathering Storm expansion pack.
Strategy
The new District mechanic is a real game changer for the Civilization series, on several levels:
- It forces you to consider how to use the land around your City Center. Of course, this is only a part of the new de-centralization drive, introduced in Civilization VI, but it is arguably the much more important part than the Wonder construction. Districts are essential to city development, Wonders are not. And in any case, districts will compete directly with Tile Improvement placement, as permanent standard improvements of the land.
- It blocks the buildings you have available for construction. Most of these are now tied to a specific District, and if you don't construct it in the city, you won't have access to the buildings in question.
- Since most Districts are Specialty districts (i.e. limited by Population), you are forced to plan ahead of time the order of the districts you want constructed in each city.
Of all these factors, the first one is maybe the most immediately problematic: each District needs to occupy a tile within the city's limits (that city, not a nearby city). This creates the immediate question of whether you have a suitable tile at all within current city limits! Although most districts aren't limited as regards their disposition, there are still rules to follow (can't place a district on a Resource tile, or a tile with a non-removable feature, etc). And then there is the secondary consideration of Adjacency bonuses - most districts will have some ideal locations around the city, and others not that good. Many times bonuses for different kinds of districts will overlap, forcing you to think which one you need the most at the moment. In short, you'll find that on many occasions you will be forced to buy suitable tiles if you want to maximize your future district's effectiveness; on other occasions you will be forced to make sacrifices. In all cases planning ahead will help you immensely here - settle cities and then immediately plan which districts you want to build and where. Don't hesitate to remove Bonus Resources (Harvesting them, of course!) to make space for Districts. You will be rewarded well.
Planning is also the key to the second and third problematic points: the fact is you are only able to build districts (at least Specialty ones) as your current ![]() Population allows. This means in practice that you will need to think ahead of which districts and buildings you need right now, and which you can delay and build later. Here is where technological and civic progress comes into focus: although most districts get unlocked in the first two Eras, there are some pretty important ones that don't come online until much later in the game! And it is often the case that, when they do unlock, you will have not enough Population to build them and make use of them right away!
Population allows. This means in practice that you will need to think ahead of which districts and buildings you need right now, and which you can delay and build later. Here is where technological and civic progress comes into focus: although most districts get unlocked in the first two Eras, there are some pretty important ones that don't come online until much later in the game! And it is often the case that, when they do unlock, you will have not enough Population to build them and make use of them right away!
As most things in this game, District building depends on your overall strategy: what aspect of the game is the most important for you in general, and what are your empire's deficiencies right now. Also, tech/civic development somewhat limits what types of districts you can construct in the early stages of the game, so let's discuss this:
The first districts you can unlock are: Holy Site (potentially unlocked with the first tech you research), Campus and Encampment (unlocked potentially with the second tech). Around 70% of the time you'd want to build the Holy Site first, so as to attempt to Found a Religion - this is an asset which could help immensely with most victory conditions in the game, even Domination victory. But if you decide you're not that keen on Religion (and the competition is usually too stiff, especially on higher difficulty levels), you should go with Campus as the first district - the potential benefits are much quicker tech progression (which also unlocks more advanced military tech, and indirectly helps even domination players) and an early Great Scientist. Only the die-hard, early-conquest players should go straight for an Encampment, which will yield an early Great General and help their conquering a neighbor nation within the first 100 turns.
The Government Plaza is a special case: it also unlocks early, but it's not related to specific strategies, and rather to general development of your empire. It has several benefits:
- It yields Governor Titles for each building constructed in it, including the district itself (so, 4 in total);
- Its buildings provide great bonuses, each different one tailored to specific game strategies;
- It provides a Standard Adjacency bonus to other nearby districts, in addition to the Minor one, and
- It provides +8 Loyalty to its city.
Plus, its ![]() Production cost is roughly half that of other districts, which makes it easy to construct even in newly-established cities! However, you can only have a single Government Plaza in your Empire, so you have to think very well where and when construct it. You could choose to build it ASAP, which most probably will mean having it in your
Production cost is roughly half that of other districts, which makes it easy to construct even in newly-established cities! However, you can only have a single Government Plaza in your Empire, so you have to think very well where and when construct it. You could choose to build it ASAP, which most probably will mean having it in your ![]() Capital. This will give you early access to the extra Governor titles, which could be priceless. However, you will forego the Loyalty boost effect, which will be useless in the Capital. Or, you could wait a bit and build it in a fringe city. where the Loyalty boost will matter, but you may have troubles constructing the Buildings of the district (which, unlike the district itself, are very expensive, and can't be bought with
Capital. This will give you early access to the extra Governor titles, which could be priceless. However, you will forego the Loyalty boost effect, which will be useless in the Capital. Or, you could wait a bit and build it in a fringe city. where the Loyalty boost will matter, but you may have troubles constructing the Buildings of the district (which, unlike the district itself, are very expensive, and can't be bought with ![]() Gold) - this will have the unwanted side effect of delaying access to their awesome bonuses. But whatever you do, try to build it in such a way as to be able to build other districts around it, in order to use the Standard Adjacency bonus. The ideal location would be somewhere between a River and a Mountain, in a flat area - this way you can construct a Commercial Hub, a Campus, and possibly an Industrial Zone nearby, all with their respective bonuses activated and enhanced by the Plaza.
Gold) - this will have the unwanted side effect of delaying access to their awesome bonuses. But whatever you do, try to build it in such a way as to be able to build other districts around it, in order to use the Standard Adjacency bonus. The ideal location would be somewhere between a River and a Mountain, in a flat area - this way you can construct a Commercial Hub, a Campus, and possibly an Industrial Zone nearby, all with their respective bonuses activated and enhanced by the Plaza.
In the Classical Era the rest of the main districts will be unlocked (save one): the Theater Square, Commercial Hub, Harbor, as well as the less important Entertainment Complex. Of these the most important, maybe the second most important overall after the Campus and Holy Site, is the Commercial Hub - besides an easily-activated ![]() Gold Adjacency bonus, it allows an additional Trade Route, which is sorely needed by everyone, and starts your progress towards Great Merchants - one of the universally useful Great People in the game. However, seafaring civs will want a Harbor instead of a Commercial Hub- its benefits are even greater, especially for cities along the Coast. And of course, the Theater Square will boost civic development for everyone. It is, however, especially important for players which pursue a Cultural victory - both for the Great Person points it provides (one for each culturally-oriented Great Person), and for the Great Work slots. They might consider building it as their second district, if they could progress fast enough.
Gold Adjacency bonus, it allows an additional Trade Route, which is sorely needed by everyone, and starts your progress towards Great Merchants - one of the universally useful Great People in the game. However, seafaring civs will want a Harbor instead of a Commercial Hub- its benefits are even greater, especially for cities along the Coast. And of course, the Theater Square will boost civic development for everyone. It is, however, especially important for players which pursue a Cultural victory - both for the Great Person points it provides (one for each culturally-oriented Great Person), and for the Great Work slots. They might consider building it as their second district, if they could progress fast enough.
At this early stage of the game, the Entertainment Complex can be important in 2 cases: for aggressive conquerors which have problems with ![]() Amenities, and for cities with Loyalty problems. Later, Entertainment Complexes could turn into nice boosters for 'special' city stats, such as
Amenities, and for cities with Loyalty problems. Later, Entertainment Complexes could turn into nice boosters for 'special' city stats, such as ![]() Tourism, also cities with Rainforests can use the Zoo to get
Tourism, also cities with Rainforests can use the Zoo to get ![]() Science yields there. But there is one more use for these districts: a Loyalty flip! Build them in border cities with good
Science yields there. But there is one more use for these districts: a Loyalty flip! Build them in border cities with good ![]() Population, then use their Bread and Games project to apply Loyalty pressure to your neighbors, and maybe eventually flip them to your civ!
Population, then use their Bread and Games project to apply Loyalty pressure to your neighbors, and maybe eventually flip them to your civ!
The last of the 'main' districts, the Industrial Zone unlocks in the early Medieval Era. Its ![]() Production bonuses benefit all strategies, so constructing it is a no-brainer. However, try to plan strategically and build a Zone within 6 tiles of multiple cities, so that you could use it to generate
Production bonuses benefit all strategies, so constructing it is a no-brainer. However, try to plan strategically and build a Zone within 6 tiles of multiple cities, so that you could use it to generate ![]() Power for them.
Power for them.
At this stage of the game you will be constructing multiple districts in each city. Here comes the next challenge: the Population constraints, which will force you to evaluate which districts you need the most, both in any given city, and in your empire as a whole. Multiple Campuses will speed up your technological progress - something which is universally useful; multiple Commercial Hubs will give you lots of ![]() Gold to spend as you will; multiple Theater Squares will speed up your Civic development. Of course, players with a Religion will want multiple Holy Sites to fuel its expansion; although good
Gold to spend as you will; multiple Theater Squares will speed up your Civic development. Of course, players with a Religion will want multiple Holy Sites to fuel its expansion; although good ![]() Faith generation has other uses as well, and Tier 3 Holy Site buildings have nice additional bonuses. And seafaring civs will want a Harbor in all their coastal cities; militaristic players, however, do not necessarily need multiple Encampments! An Encampment has two main purposes: 1) To improve the quality of produced units (by boosting their XP gain rate), and 2) To produce Great General points. While for the second point more is indeed better, it is clear that not every single city in your empire will be a unit-producing center; so, you could just as well designate several key cities as such and build Encampments there. You should still produce enough Great General points to earn them regularly, if not all the time. Now, an Encampment may also serve a defensive purpose - but this is valid for all civilizations, not just militaristic ones. Consider importantly located cities across your empire, and build Encampments there for additional defense.
Faith generation has other uses as well, and Tier 3 Holy Site buildings have nice additional bonuses. And seafaring civs will want a Harbor in all their coastal cities; militaristic players, however, do not necessarily need multiple Encampments! An Encampment has two main purposes: 1) To improve the quality of produced units (by boosting their XP gain rate), and 2) To produce Great General points. While for the second point more is indeed better, it is clear that not every single city in your empire will be a unit-producing center; so, you could just as well designate several key cities as such and build Encampments there. You should still produce enough Great General points to earn them regularly, if not all the time. Now, an Encampment may also serve a defensive purpose - but this is valid for all civilizations, not just militaristic ones. Consider importantly located cities across your empire, and build Encampments there for additional defense.
As you start having multiple copies of each Specialty district type your Great Person points generation will take off, along with all your other stats. But keep in mind that the late game Districts - the Aerodrome (which allows training and maintaining airplanes), and the Spaceport (which is needed for the Science Victory) are also Specialty districts, depending on Population limits! And they unlock much later in the game (Modern and Atomic Eras), while being just as important as earlier districts! Don't allow a situation when you've build so many districts in each of your cities that you are unable to build these, and have to wait for many turns so that Population increases!
Aerodromes are important primarily for offensive players seeking Domination victory - it is very difficult to attain one without a good Air force in the late game. Of course, airplanes for defensive purposes are also important, especially if your neighbors are aggressive and are ahead of you in the science field. However, it is possible to use ground- or sea-based anti-air to defend; they won't serve for offense, though. In short - plan ahead of time to have at least 2 cities capable of constructing an Aerodrome as soon as you unlock it with Flight. They should be in strategic locations near the borders of your empire, so that their airplanes could be useful.
The Water park also unlocks late in the game; but since it is virtually a copy of the Entertainment Complex meant for coastal cities, we won't discuss it much. Suffice it to say that it is a good choice to build instead of an Entertainment complex for empires which have lots of water tiles and not that many land. But it will rarely be much more useful.
Now, the Spaceport could be the most important district in the entire game, or the least important one - depending on whether or not you are pursuing a Science victory. In the first case, you should take care to be able to build it as soon as you research Rocketry; and not just a single one at that! The Spaceport is the most ![]() Production- costly district in the game (it costs as much as most Wonders), and you need one for all Science Victory-related Projects. Now, despite the fact that the different steps usually require one-another (i.e. Launch Moon Landing requires Launch Earth Satellite, etc.), meaning that technically you may complete them with a single Spaceport, enemy Spies can attack your Spaceports directly, disabling them and halting your progress. Having multiple Spaceports will help with that.
Production- costly district in the game (it costs as much as most Wonders), and you need one for all Science Victory-related Projects. Now, despite the fact that the different steps usually require one-another (i.e. Launch Moon Landing requires Launch Earth Satellite, etc.), meaning that technically you may complete them with a single Spaceport, enemy Spies can attack your Spaceports directly, disabling them and halting your progress. Having multiple Spaceports will help with that.
Civilopedia entry
In Civilization VI, buildings are no longer trapped in your City Center, but may sprawl across your territory as part of districts. The map is more important than ever as you are faced with important strategic placement decisions. The Campus and Holy Site each receive special boosts from placement near Mountain tiles, but the Campus also benefits from a nearby Rainforest tile.
A city must expand its ![]() Population before it can construct multiple districts:
Population before it can construct multiple districts:
- 1 Population for 1 District
- 4 Population for 2 Districts
- 7 Population for 3 Districts
- Each additional District requires +3 Population
The Aqueduct, Neighborhoods, and Spaceports ignore this ![]() Population requirement. Districts which require a certain number of
Population requirement. Districts which require a certain number of ![]() Population are specialty districts.
Population are specialty districts.
When a city is ready to construct something, the Choose Production button will appear. If a district can be constructed, it will appear on this menu. Click on the district to order the city to begin construction, opening the district placement lens. Here, you will be given an overview of the different yield outcomes available on the tiles surrounding your City Center, and you can better make a decision about where to place your district. This lens will also show you which tiles are unavailable, as some districts have very specific placement requirements (for example, the Encampment cannot be built adjacent to a City Center). Furthermore, all districts must be built within 3 tiles of a City Center.
Districts may be placed on top of features such as Woods or Rainforest if you have the technology to remove those features, but for a longer construction time. No District can be built on a floodplain.
Related achievements

|
District 12
Build every district type in one city and the Colosseum
|

|
Meiji Restoration
Playing as Japan, have a district with 6 adjacent unpillaged districts.
|
| Civilization VI [edit] | |
|---|---|
| Rise and Fall • Gathering Storm • New Frontier Pass • Leader Pass | |
| Lists | |
Concepts
| |
| Miscellaneous | |